File Import Setup
This function deals with setting up file imports.

Select the File Import Control menu option to see the form below. Multiple files and file types can be defined to be imported into a range of tables. Each one of these has a File Import Description.
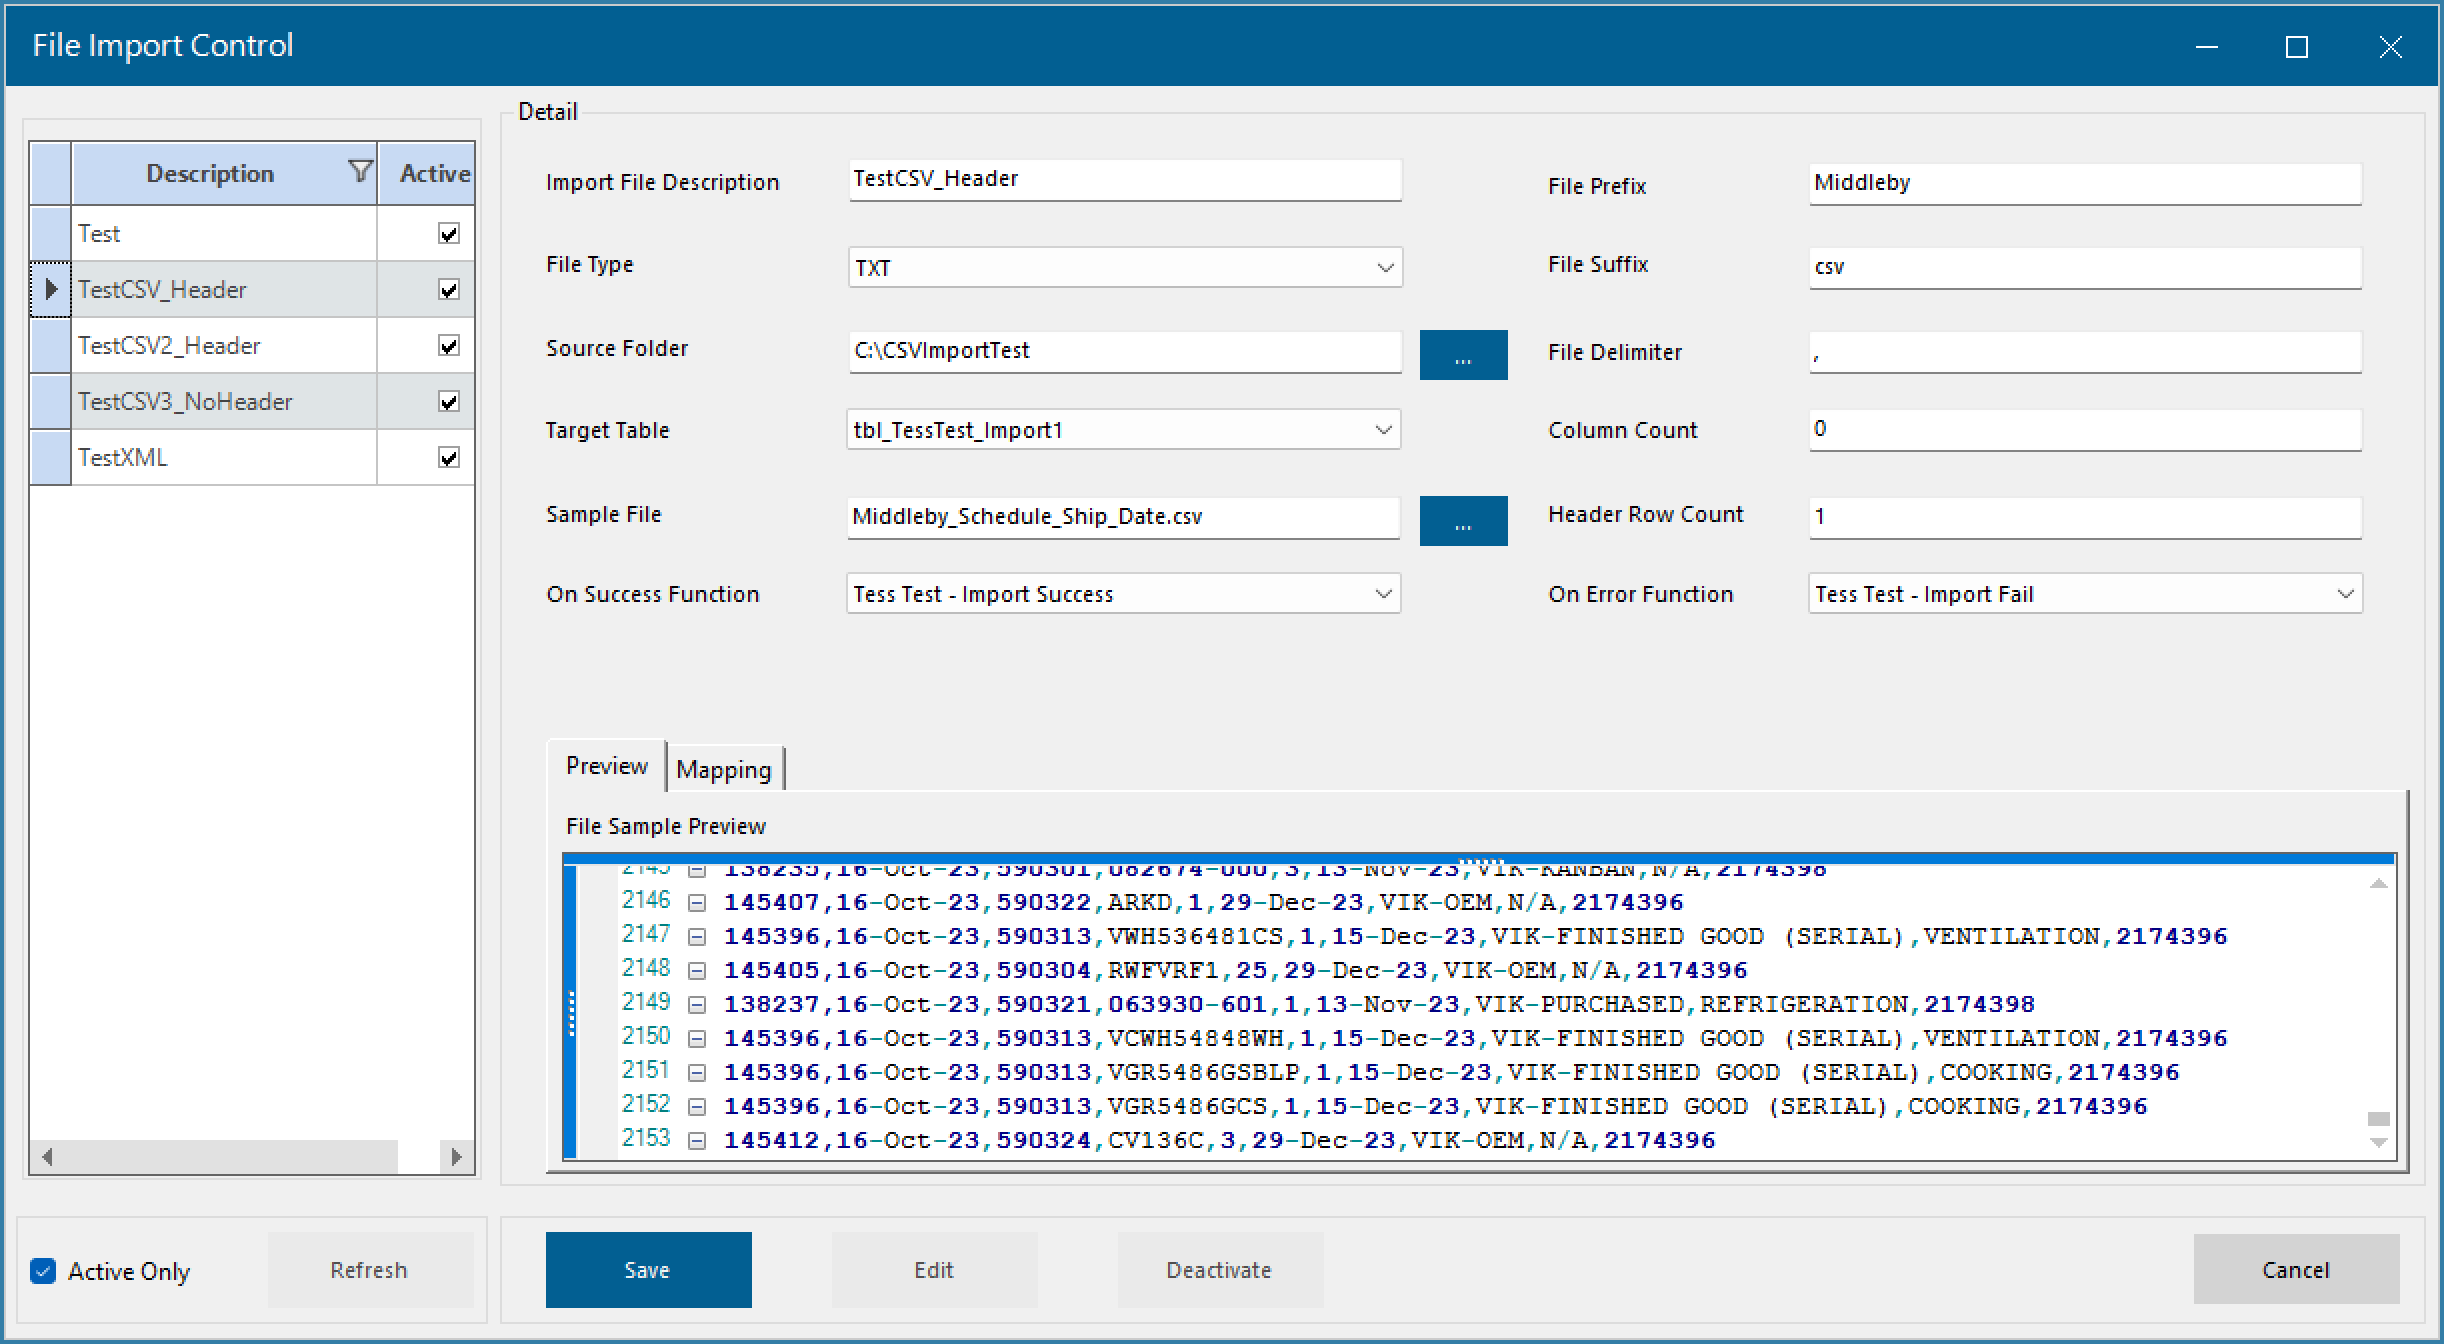
File Import Control Form
The first step is to give the defintion you are building a description using the Import File Description field.
The then select the File Type, the file prefix and the file suffix on the file name as well as the source folder where the file can be found. It is possible to import files from the same or different folders. i.e. different file import setups can all look at the same folder.
If you don't specify a suffix and prefix, then all files in the folder will be imported. Of course if you have different import templates then they either need to be named with a specific prefix/suffix structure or come from different folders.
The file suffix issue is important to understand. The suffix applies to the filename + extension. For example, if we've setup a configuration with a prefix of a filename with a prefix ABC then all files begining with ABC will be imported.
example are: ABC27Apr2024.csv or ABCJustAFileName.txt.
The suffix works in the same way but includes the extension. So,if you suffix is csv then these files would be imported
ABC27Apr2024.csv, AFile.csv
If you suffix looks like this though: import.csv then only files like this would be imported:
File1Import.csv, AnyFileImport.csv
BUT FileImport1.csv would NOT be imported.
For text files (of which CSV files are an example), you are also required to define the File Delimiter which is the separator between different elements (or columns). This most commonly a , but could be any char (or characters)
Once your file has been defined, you have to specify the name of the database table you will be importing the data into. The column count field is not currently used leave it as zero.
Select a sample file that meets are the characterisitc you have defined and you should see the preview populated to ensure you have the right file. You can then specify the number of header rows if there are any.
The last two definition fields are optional - if the import succeeds or fails, you can choose to execute a function area. The same one or a different one for each state. Please note that imports are 'all or nothing'. This means that either all the rows in the file will be imported into the database or none of them will.
The last step is to do the mapping. This is where you specify which column in the file maps to each column in the target database table. The mapping form is shown below.
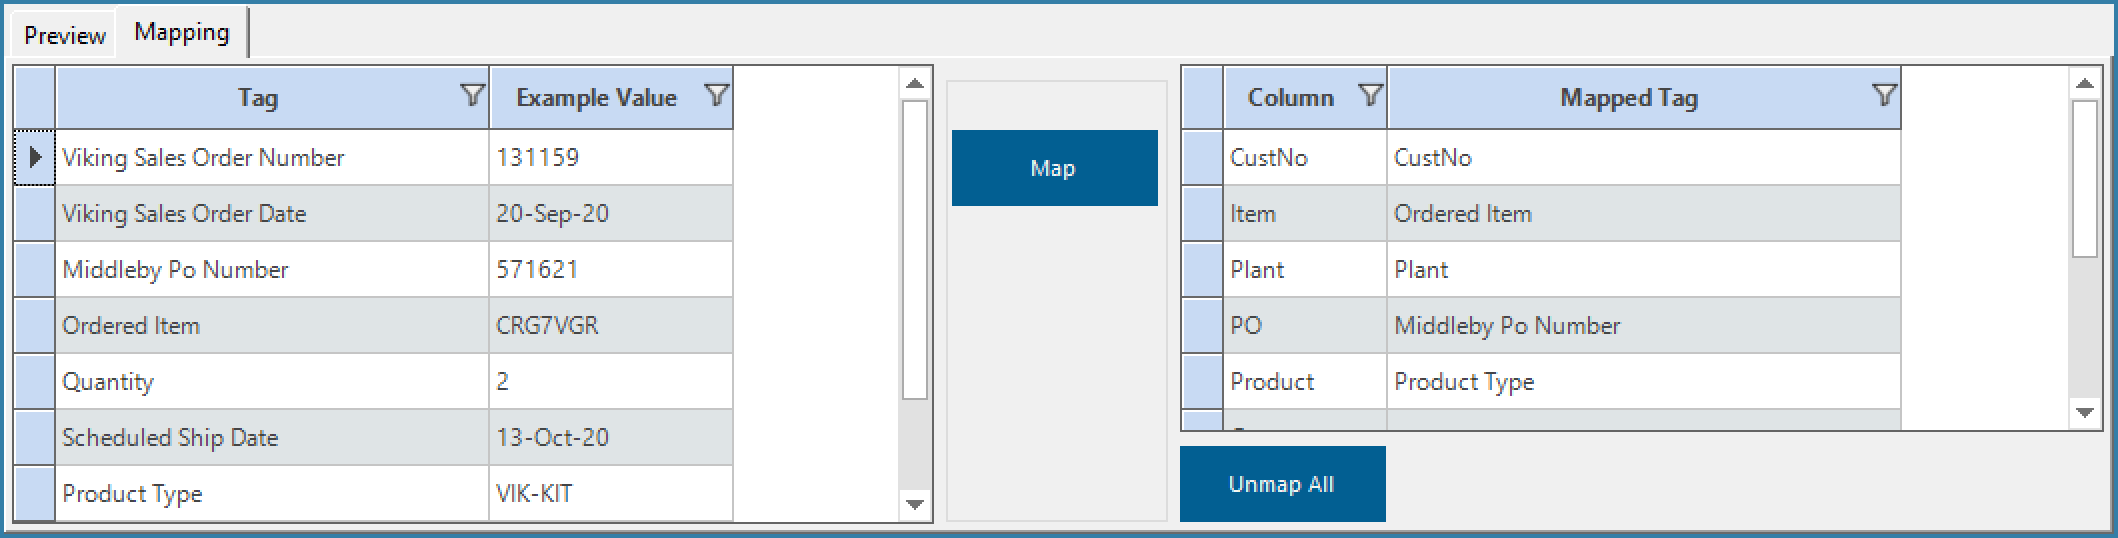
File Import Mapping form
The LHS grid shown the data in the sample file - header column and a sample value. Select any row and map to the required database table column.
We have deliberately allowed the same tag to be mapped more than once.
XML files are setup in exactly the same way but of course with XML there is no need to define a delimiter or specify the number of header rows.
