TL Selector
The TL Selector overlay is supported on both Android and EazyTouch. This overlay or panel is widely used and allows the user to specify a view that they would like to look at and then see the data on the EazyTouch form in a grid format. This type of overlay requires a function area to be defined but it does not require any prompt sequence to be created.
Create a function area as usual but on the first tab of the function area maintenance form set the options as highlighted below
- Check the TouchScreen checkbox
- Check the Overlay checkbox
- If you want to post data to Syspro select the 'Make ERP Call from this function area' checkbox
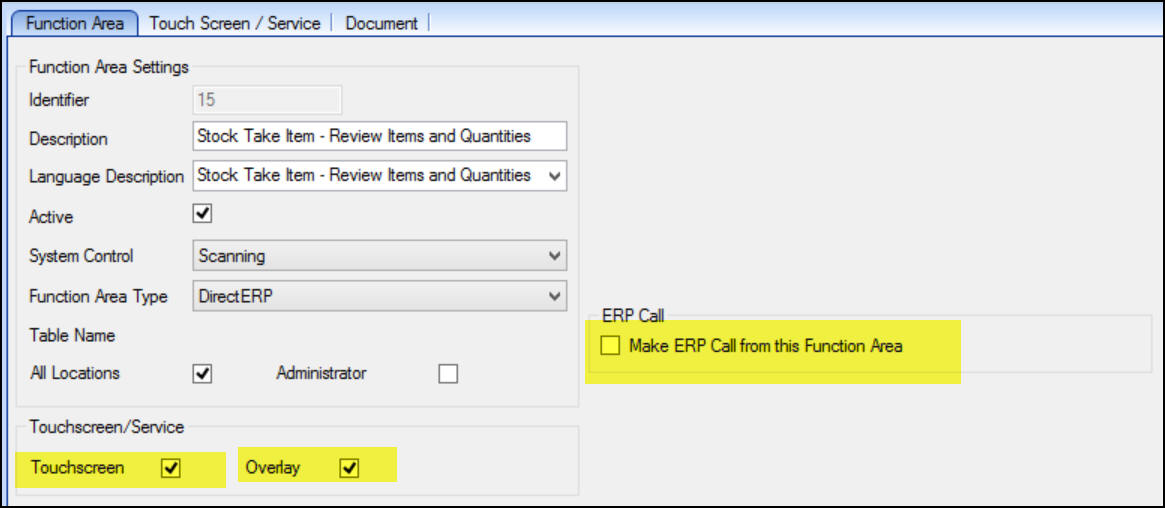
Function Area setup
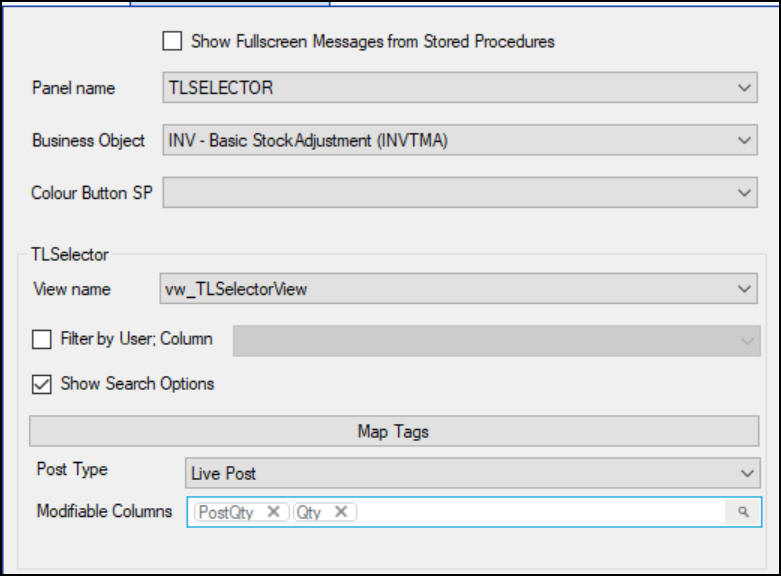
On the TouchScreen/Services tab, set the options as shown below:
Set the Panel name to TLSELECTOR
If you selected to do an ERP post, you will be able to enter a Business Object name otherwise this field will remain greyed out
In the TLSelector box, set the view name to a valid view - this MUST be done
Additional Options:
- Modifiable Columns - if you want users to be able to change data in the grid then you can select which columns will be modifiable.
- Filter by User - if you want to see data relating only to a specific user, you can put the user name into a column of the grid and select Filter by User and also define which column has the username you wish to filter by. This setting will filter the data before it is displayed on the EazyTouch screen.
- Show Search Options - This is no longer used.
- Map Tags - this is used to map columns in the grid to Syspro Business Object tags for posting to Syspro. This is described below. It is important to note that there will be a separate business object call done for each line that is selected. If it is required to group lines into a single post, this is done using the General Grid overlay.
- Post Type - It is possible to do either Live Posting or Buffered Posting from a TL Selector Overlay. See here for a description of the optoins
TL Selector Specific Setup
For this example we selected a business object to post an Inventory Adjustmen to Syspro. When we select to Map Tags, the screen below appears. The list on the LHS is all the columns in the view and the list on the RHS are all the tags we have defined in our XML to post an adjustment to Syspro.
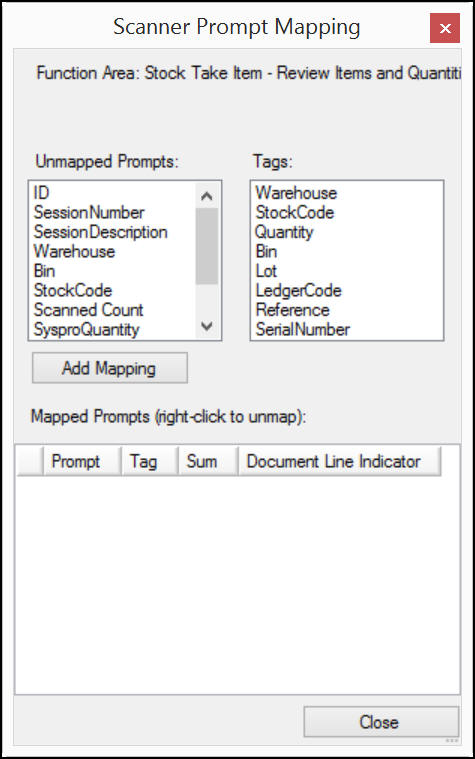
Tag Mapping
Points to Note regarding the TL Selector view. There are some required columns and without them the grid will not work correctly.
- The first column must be an ID (int). This is the ID passed to the script buttons when using VB provider functionality. It must be a unique integer value since the VB Provider codes uses this ID to create Audit table rows. Details on how to use the VB Provider audit trail is covered in the Technical Troubleshooting section of the on line help.
- If you want rows to be coloured, the second column must be called ProcessStatus. Rows will be coloured as follows:
0 = white
5 = green
10 = red
15 = yellow
20 = orange
25 = pink
- If you want to filter by user (as above) use the third column to identify the user id (it can be called anything)
- The number of columns allowed in the view is limited to 20 (this is limited by the number of columns logged in the audit trail).
The first two columns will not be visible on the grid.
An example of a TL Selector Overlay along with the VBP buttons that will be passed the selected row IDs is shown below.
