Linking Images to Buttons
As mentioned before, this is supported on EazyTouch and Android. Once images have been uploaded they can be allocated to one or more function areas or workflows. This is done using the Function Area Image Allocation form which is accessed from the Application Control Menu as below.

Menu Selection for Image Allocation
The image allocation form as below will appear

Image Allocation Form
In order to allocate an image, select a function area, select an image and click on Assign. In order to change the image allocated to a function, simply repeat this process and the existing allocation will be overwritten with the new one.
If you want to remove an image allocation, simply click on Deactivate. The function area will remain on the list but the image allocation will appear. If you do not see an image you expect to see here then it still needs to be uploaded using the image maintenance process.
Exactly the same process is followed for both Function Areas and Workflows. Note that the Function Area Image Allocation form has one tab for function areas and another for workflows.
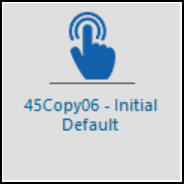
If there are no images defined, the system default is used. The defaults are shown below
Default WorkFlow Image Default Function Area Image

