In Process Results Capture
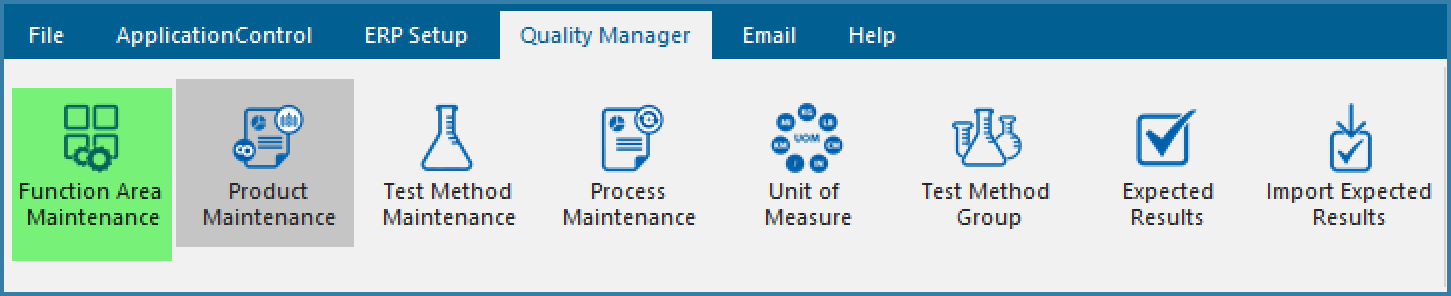
InProcess Results Capture is built using the Function Area Maintenance form on the Quality Manager Menu as shown below.
This form is supported on both EazyTouch and Android. The form is used specifically to capture results for Test Methods defined using the TransLution Quality Manager module.
This function area differs from the Test Method Results Capture covered previously in that the previous overlay dealt with capturing results for a known sample barcode. The In Process Results Capture process however deal with capturing results at a specific date and time to monitor the environment rather than the product. This means there is no specific sample barcode to scan.
A sample of the Function Area Over lay definition form is shown below.
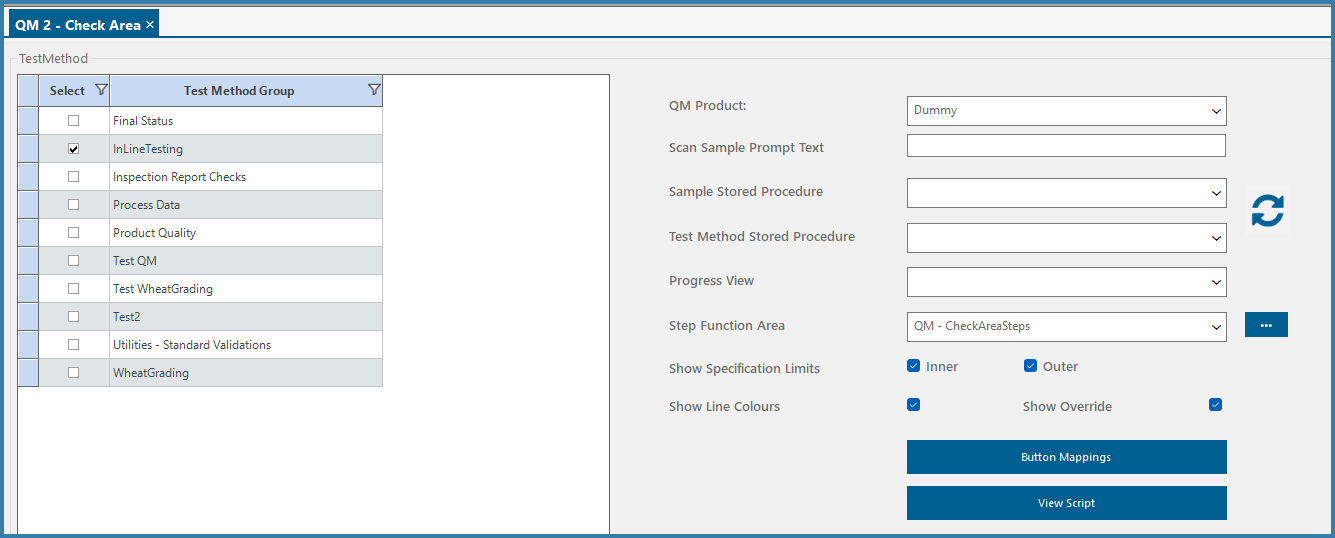
Function Area for In Process Results Capture
Select Test Method Groups: It may be that there are some people who can capture only some test results and others who capture another set of results. If these test methods are grouped separately, then two different function areas can be used, each with access to a different test method group. Now, standard user security of giving users access to certain function areas will also give them access only to certain test method groups for results capture.
Product: The In Process test are linked to a specific QM product which must be selected here. For in Process Results Capture we recommend defining a dummy product.
Scan Sample Prompt Text: This is not required for the In Process Results Capture
Sample Stored Procedure: This is not required for the In Process Results Capture
Test Method Stored Procedure: This allows for a custom validation to be defined when selected a Test Method to capture results against. The most common use here is to use this to ensure test results are captured in a specific sequence based on the selected Test Method Group. The Sample ID and the Process ID for the selected Test Methid group are passed to this stored procedure.
Progress View: The progress view allows for a custom view to show additional information. This is custom built and depends on the site requirements. The Sample ID of the current sample is passed to the view to filter data.
Step Function Area: This overlay does not capture results against a sample of product specifically, it rather captured results against a group of data points for example Batch Number, Production Line and Date. These data points are defined using a standard flow step function with standard input steps and validations. DO NOT ADD A CLOSE STEP TO THIS FUNCTION.
Show Specification Limits: The QM product can be used in various ways. If it is required for the user to see the expected results of the test being done then they can be shown by selecting Show Specification Limits - inner, outer or both. However if the test is required to be a 'blind' test then these limits would not be shown.
Show Line Colours: If the tests are blind tests then generally you would not show lines in different colours depending on the value captured, however, if not, then it may be useful to change line colour to highlight issues. So, if no results have been captured, the lines would be white. If the result fits within the outer specification limits but is outside the inner specification limits, it would be yellow. If the results are outside the outer specification limits, the line would be red.
Button Mappings: It is possible to link standard subroutine functions as buttons on Quality Manager forms like you do with Grids. This button lets you define those mappings. This mapping works in exactly the same way as grid subroutine mappings - the SampleID is available to be passed as a paramter to the Subroutine
View Script: This lets you view the SQL scripts for any custom views or stored procedures used by the function.
A sample screen that would be seen by the operator is shown below:
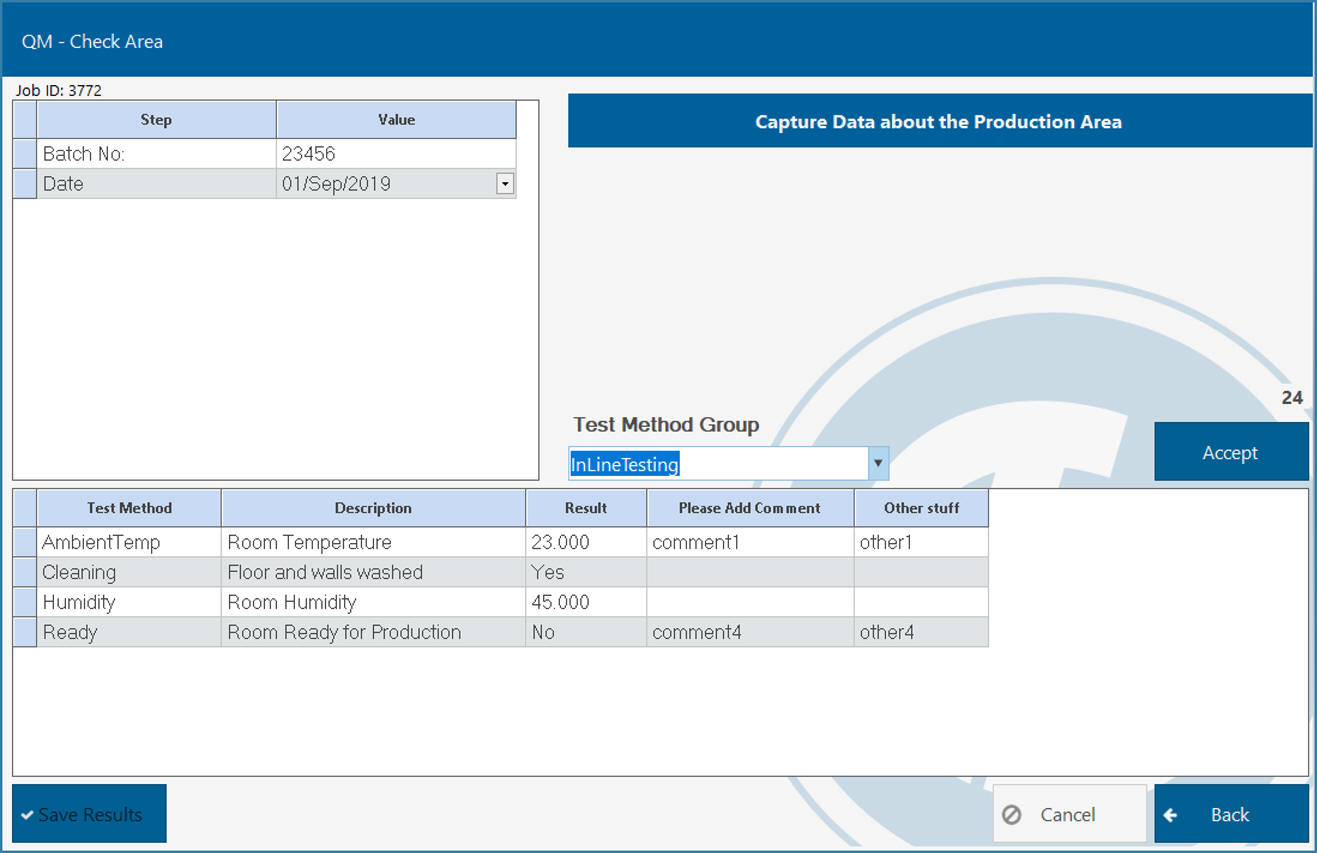
EazyTouch In Process Results Capture Overlay
The next step is to define which prompts the operator would see - prompts to define date and time and other requirements for the results. This is done by linking the overlay to a standard Flow Step Function. From a user perspective, it is important to note that each prompt has to be entered in sequence and that only when the Accept button is clicked is the Test Method Group displayed. If there is only one Test Method Group (set of tests) linked to the function area then the test method group is displayed automatically along with all the associated test methods. If there are multiple groups available, then the user will need to select one.
The columns - Description, Result, Please Add Comment and Other Stuff are all visible and available as a result of the setup of the Expected Results.