Wireless Setup - Windows Mobile
Please note, this should only be done by an IT Administrator or a wireless / scanner expert.
To do this you will need to open Summit, to open it you should:
· Click Start
· Click on Programs
· Click on ‘scu’ icon to open Summit
Once opened, under the Main Tab, you should see something similar to the following window.
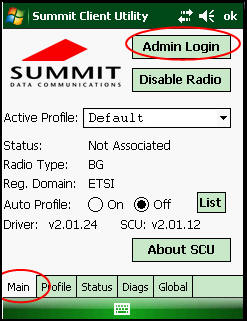
Click on the “Admin Login’ the password is SUMMIT
Under the ‘Profile' Tab, Click on New
Create a Name for the Profile, enter the Name of the SSID for your wireless access point. Change the Encryption Type to that of your wireless access point, enter the Keys and click on the Commit button.

Click on the Main Tab again and change the default profile to the name of the profile you have just created and click on OK at the top.

Setting Up the IP Address
Please note, this should only be done by an IT Administrator or a wireless / scanner expert.
It is highly recommended that all wireless scanners be issued with a static IP address.
Click on the Start logo in the task bar.
Click on Settings
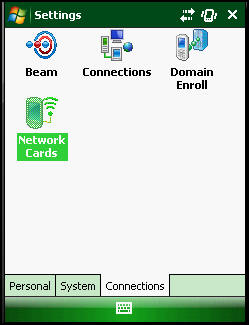
Click on ‘Connections’ tab
Click on the ‘Network Cards’ icon
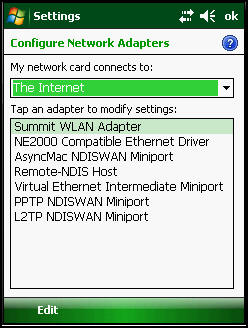
In Configure Network Adapters Window, select ‘The Work’ for the dropdown selection ‘The Internet’ cards connects to.
Tap ‘Summit WLAN Adapter’ to modify its settings
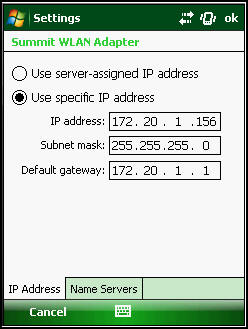
Specify an IP address as shown below.
Note: IP address will differ from site to site.