Building Flow Step Functions
The second part of the process to build scanner functions for users is to define the steps. The steps define the actions that the user needs to take or that the system takes automatically and the sequence in which they occur.
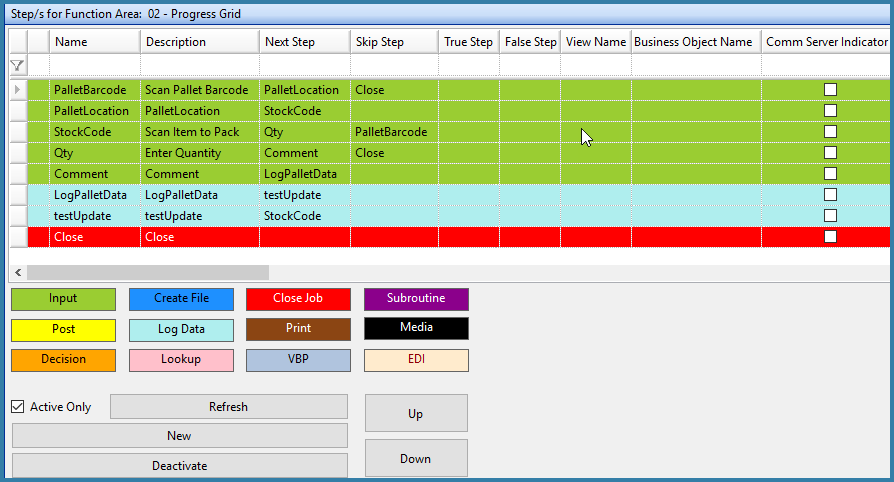
The image below shows the Step panel on the Step Maintenance form.

Step Panel on Function Step Maintenance Form
Using Up/Down
If a step needs to have its Next Step changed or if a new step is created that needs to be moved up the list, specifying the next step name does not changed the sequence in the grid, the Up and Down buttons can be used to do that. The sequence of the steps in the grid can also be managed using the Manage Sequence function
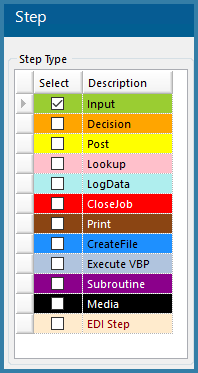
This panel shows a list of all the steps for the given function area. It also shows the sequence in which the steps will be executed (Next Step) and what happens when the user clicks on the Skip button (Skip Step). In order to add a new step, the user clicks on the New button. The first step is to select the step type on the Step Creation form shown below.

Step Type Selection
The first thing is to decide which type of step you will be creating. The step types are described on the associated pages.
Input - This step type is for standard scanner or keyboard entry type steps - scale inputs are also input steps
Post - This step will do a real-time or buffered post of data to Syspro
Lookup - This step allows for a drop down of data (e.g. a list of purchase orders)
LogData - This step logs data to a database table
Decision - This is a kind of Conditional step that goes to different steps depending on the result being tested for
Close Job - This step, as it's name suggests, serves to Close the function area
Create File - This step creates files of the selected type and logs scanned data to these files
Print - This step prints SSRS reports
Execute VBP - This step executes Visual Basic Code
Subroutine - Calls a Subroutine consisting of one or more steps
Media - This step type is limited to Android devices and allows you to capture either an image - either a photo using the device camera or an on screen image like a signature
EDI - This step uses previously scanned data to build an EDI document. In some ways it is similar to a file create step but EDI document structures are far more complicated than standard text files.