Input Steps
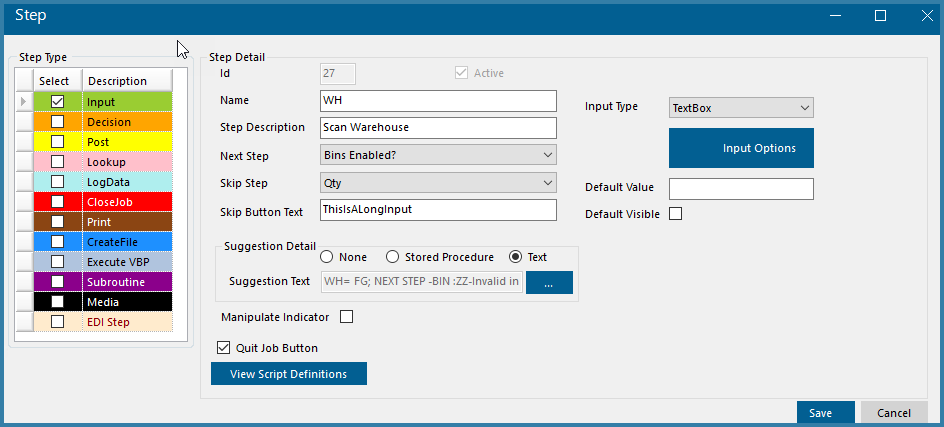
Input steps are what we would call 'standard steps'. This is how the operator is prompted to scan or enter data into the system. If the user selects a step type of Input, the form shown below appears.

Input Step Definition
The fields are described below:
Name - reference used when building the step and defining the step sequence. This is seen in Configurator only and not on end user forms. For example WHouse
Step Description - The text seen by the user on the scanner, tablet or phone. For example Please Scan the Warehouse
Next Step - here the user will be able to select the name of the next step. So for example, after warehouse, they will want to go to Item
Skip to Step - if there is need to skip a prompt then this allows the user to go to another step rather than the default next prompt
Skip Button Text - The text that will be shown instead of Skip on the Skip button
Quit Job Button - This option allows the Quit button to be visible on any step where it is required.
Suggestion Detail - This section is where the suggestion information is defined. It is possible to build a custom suggestion stored procedure for complex custom requirements but it is recommended rather that suggestions be configured by selecting Text click on the ellipses to may any previous step values to the suggestion. The Map buttons allows for steps to be mapped to the Suggestion Stored Procedure. This is covered below.
Input Type - This allows the user to choose to enter a standard input, a date/time field or a password as described on the Input Type form
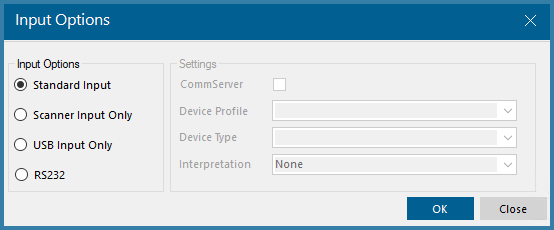
Input Options - TransLution supports input from various sources - scanner, keyboard, comm post etc. Selecting input options opens the form below.
Default Value - if the system always uses the same warehouse for example, it can be defaulted so that the user never sees it
Default Visible - If the system generally uses the same warehouse but they would like the user to be able to change it if required, the default visible is what will allow that to happen. The default value will populate the data entry text box but a user will be able to see it and change it if required.
Manipulate Indicator - This is the function that allows us to manipulate barcodes to extract different elements from the barcode. Data Manipulation is covered separately in the on line help.
If the Input Options button is clicked the following form opens. A standard input is the default. This is what is used most often and allows users to capture data using a keyboard or a scanner.

Input Options
There are other options for inputs.
Scanner Input Only: This will force the user to scan data by not allowing keyboard entry. This is described on the Scanner Input Only form.
USB Input Only: This will allow data to be read from a USB device most commonly a scale. USB Input setup is described here.
RS232 - This is to specify if the step will read data from a scale via a comm post using serial comms. The details are covered in the commserver setup.
It is important to note that once a prompt has been set up to read a USB or Serial port. it will not support any time of operator data entry. If you are not sure about the reliability of your scale communications and you want some kind of a backup process to allow data entry when scale communication fails, it is recommended that you create a second function area that is identical to your scale function area except that the scale step is NOT marked to read via RS232 or USB. That way, when the scale is broken you can use this function area to capture data.
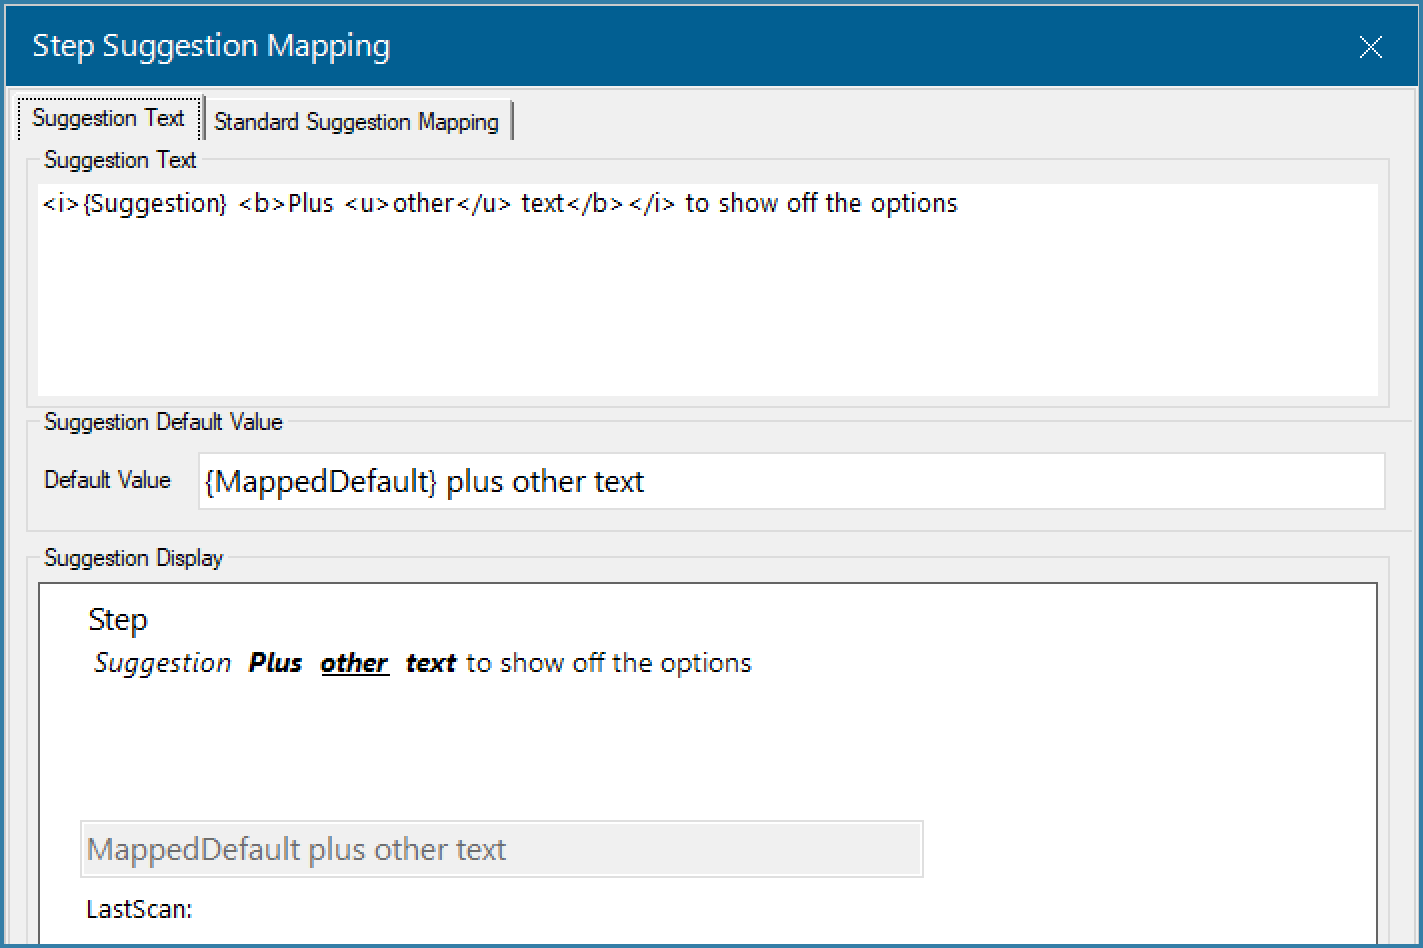
If you select the ellipses on the Text Suggestion menu the form below will opened. On this form you are able to type the suggestion text as you want it to appear. If you want to reference previous step values enclose a description for that step in brackets like this {StockCode}. Once you're done click on Save. Save before you move to the second tab to map these parameters to step values. Note that the lower half of the form shows a preview of what you will see. To see two lines simply use a carriage return

Building Manipulation Test
There is quite a lot happening here. Firstly you will notice the text formatting tags. These are supported on Android devices only and give you the option to highlight certain portions of the text in different ways. Also, you will see that we can use the Suggestion logic to display a default value that the user can then just click to enter. Note that the default value can also be dynamic and based on previously scanned values.
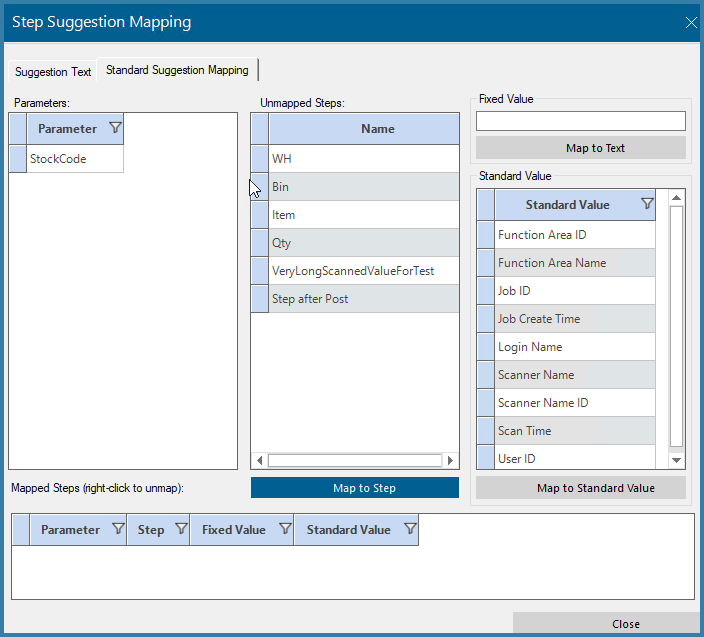
Once you've saved your setup, the second tab will show your values to be mapped. You can now map {AnyTag} to any step including the result of a manipulation or a standard value.

Mapping Steps to a Suggestion