Print Management
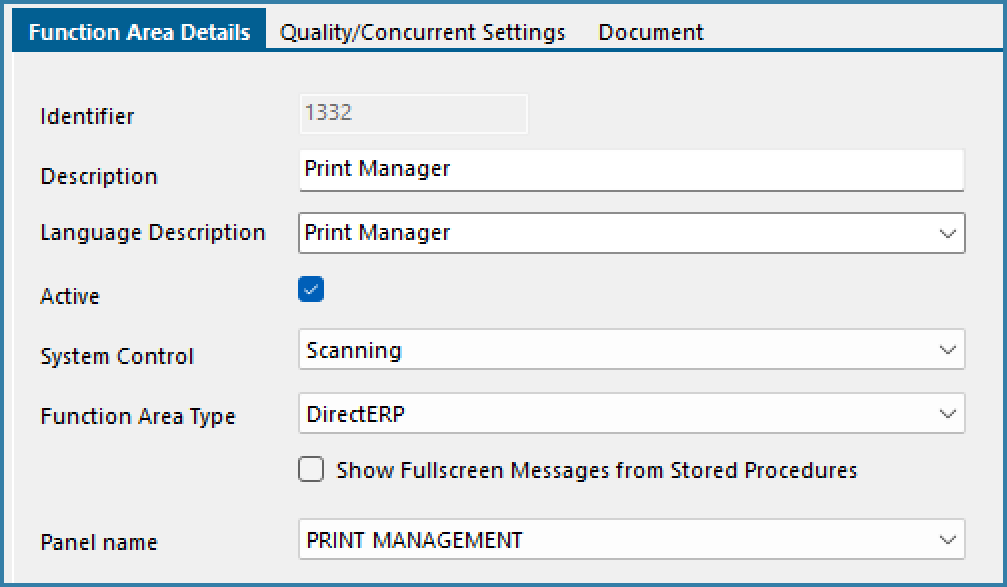
The Print Manager overlay is built using the Function Area Maintenance form. This overlay or panel is used to view and manage printing failures when using Print Steps. This grid is only available on EazyTouch for Windows.
The primary requirement is to create a function area and select the Print Management panel name as below:

Print Manager Overlay Setup
This form allows users to manage failed prints. It is important to understand the processing of rows in the Print Manager table.
All files to print are logged in a table called PRINT_MASTER. In order for the repost to print the data must be logged in a status of 1. If the print succeeds the status us updated to 20 and if it fails it is updated to 15.
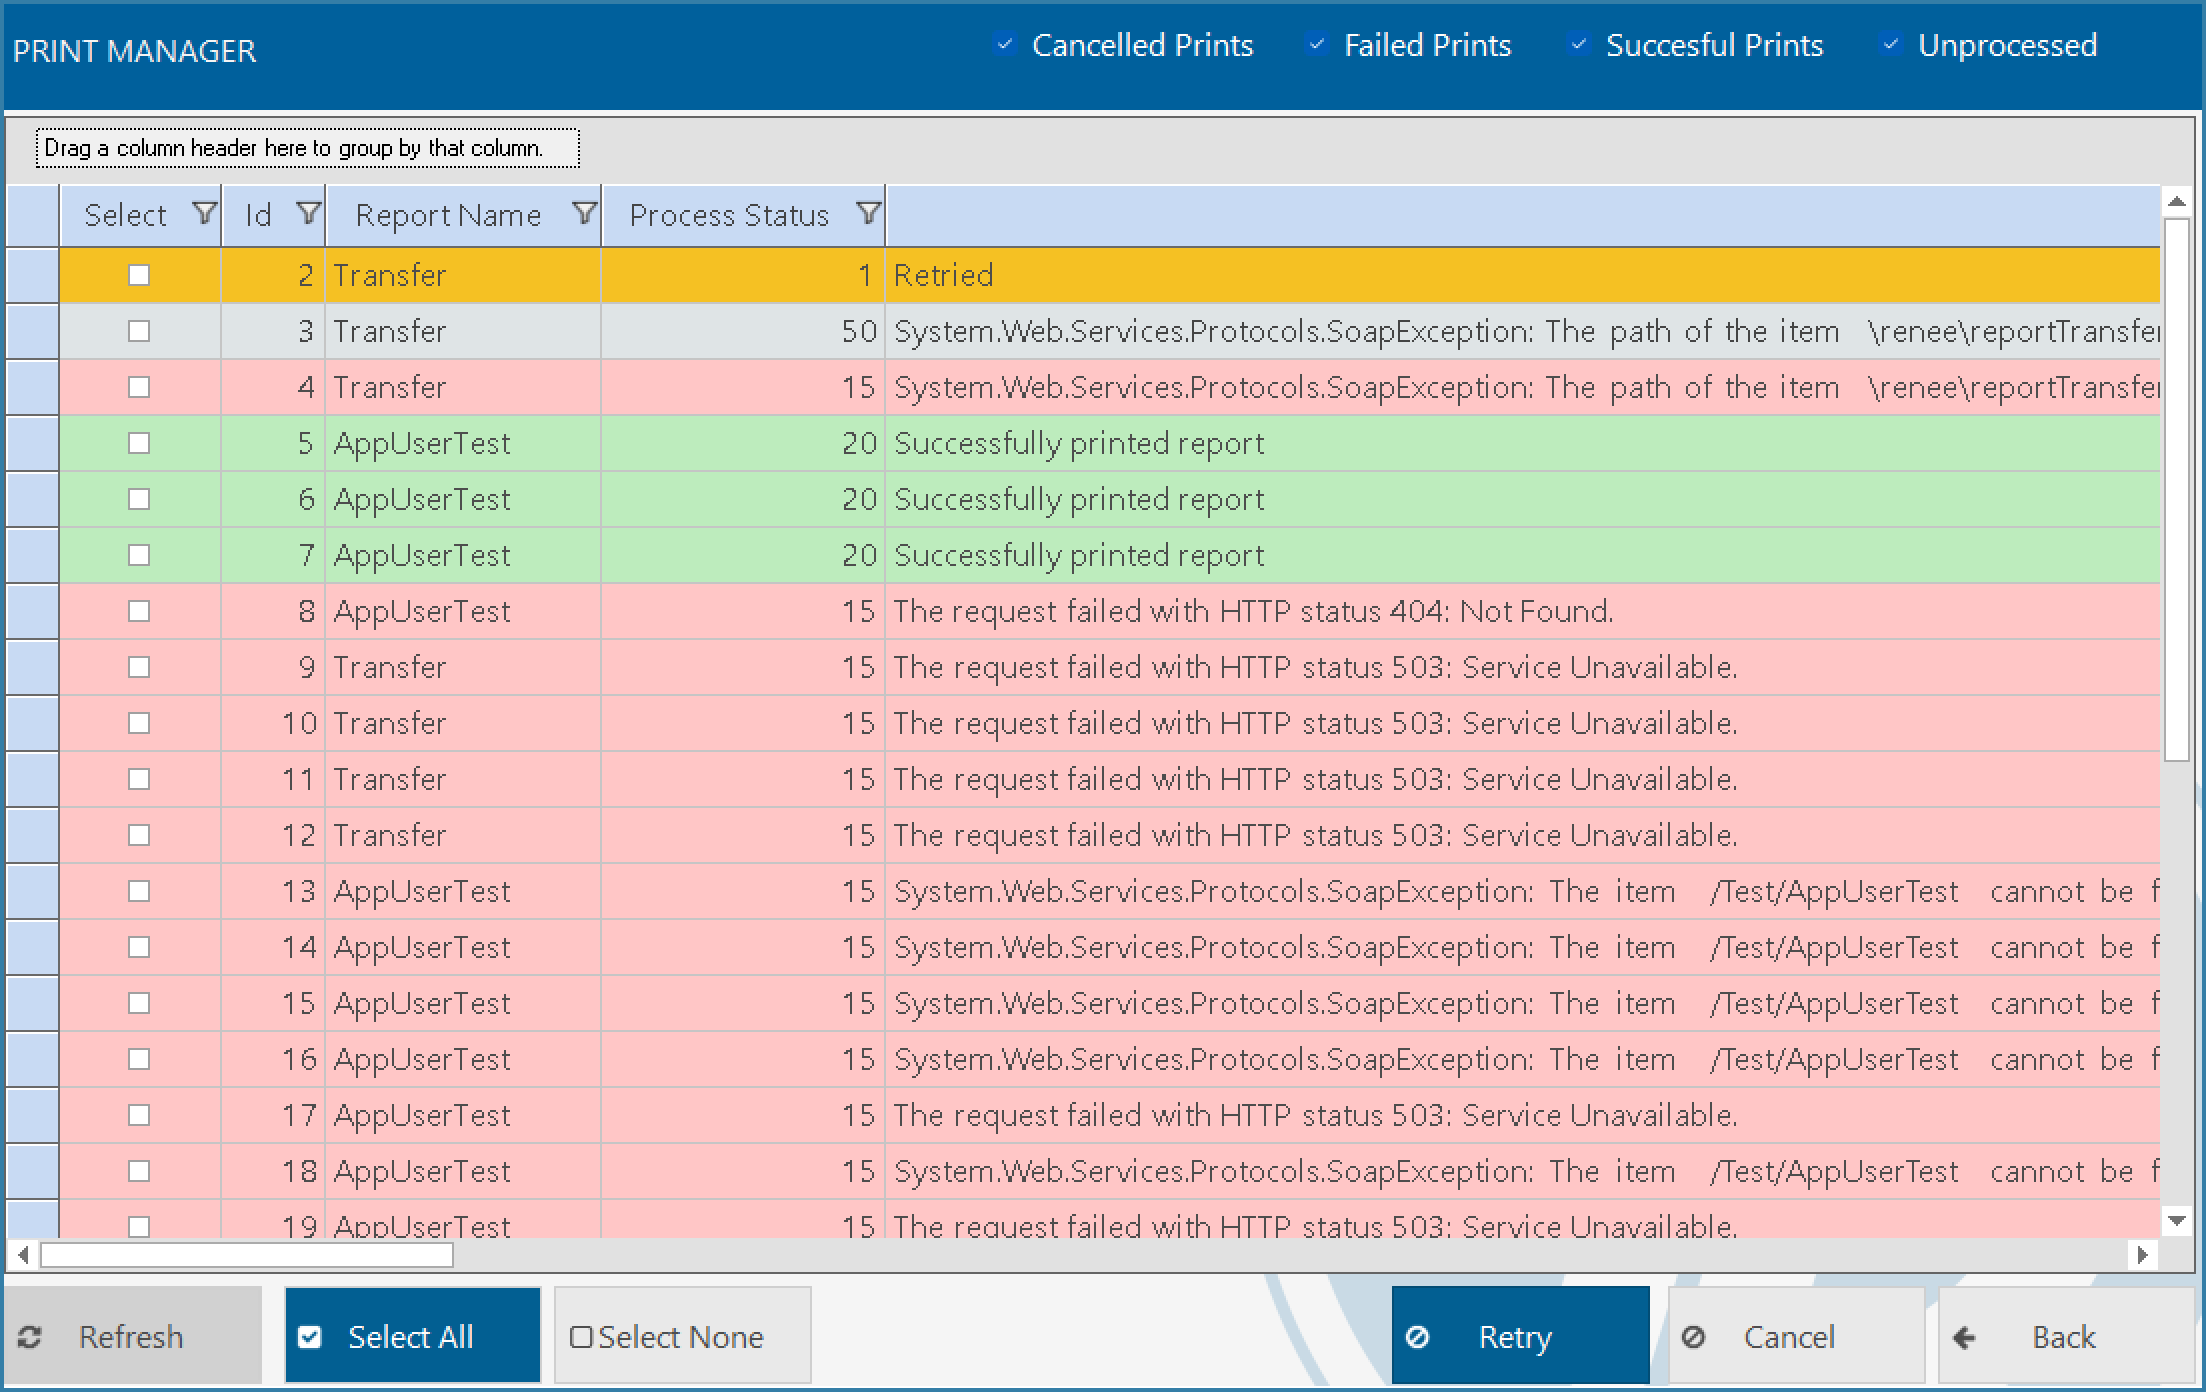
In order to view and manage failed prints, users must be given access to this function area - remember this is for EazyTouch only. The form that the user sees on EazyTouch is shown below.

Print manager form
By default users see all rows - cancelled (grey), Failed (red), Unprocessed (Orange) and Successful (green).
They can also select to view rows only of a certain type by selecting the options at the top of the form and then hitting refresh.
It is not possible to change the status of rows that have already been processed but all other rows can be managed.
These rows users can select to Retry - which will change the row status back to status 1 for processing or they can choose to Cancel rows. Cancelled rows are put into a status of 50 and not reposted again.