Using Subroutines
Subroutines provide the ability to build step functions that can be called by other functions. There is a huge benefit to this. Say for example you have built a complex data manipulation function that extracts multiple elements from a structured barcode. You then use this step in 5, 10 or 20 function areas. If the customer decides to change their barcode structure, you would need to edit the data manipulation in each place where it was used. When using Subroutines however, you build the complexity into the subroutine and call the same subroutine from every function area. When the barcode structure changes, now all you need to do is edit the subroutine.
There is another use for Subroutines which is equally significant. It is possible to call a Subroutine from both a General Grid and a TL Selector grid on Windows EazyTouch and on Android devices. This means that when you want to edit or act on data rows that have been selected in a grid, you have the option of either writing Visual Basic code and using the TransLution VB Provider to do that or you can simply do this using step functions in a subroutine. If one row is selected, then the SR function is called once and executed once. If there are multiple rows selected, the SR is either called and executed for each selected row or there is an option to execute the SR once only or the third option is to repeat only certain steps for each selected row. Please note that if you select the execute once only option then only the first selected ID is passed to the SR as it is called.
The decision about using a Subroutine of the TransLution VB Provider depends on the implementer and on the system requirements but it is probably safe to say that generally subroutines are a easier to create and maintain.
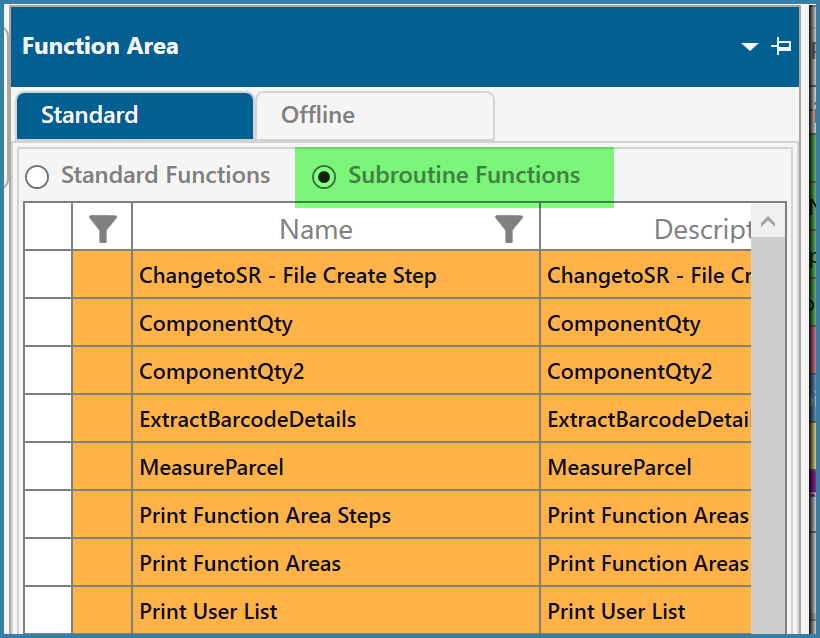
When building a subroutine, this is done in much the same way as building a normal function area. On the Function Step Maintenance form, ensure that the option Subroutine Function is selected. Note that now the New button now says New Subroutine Function area. Select this option
Subroutine Configuration
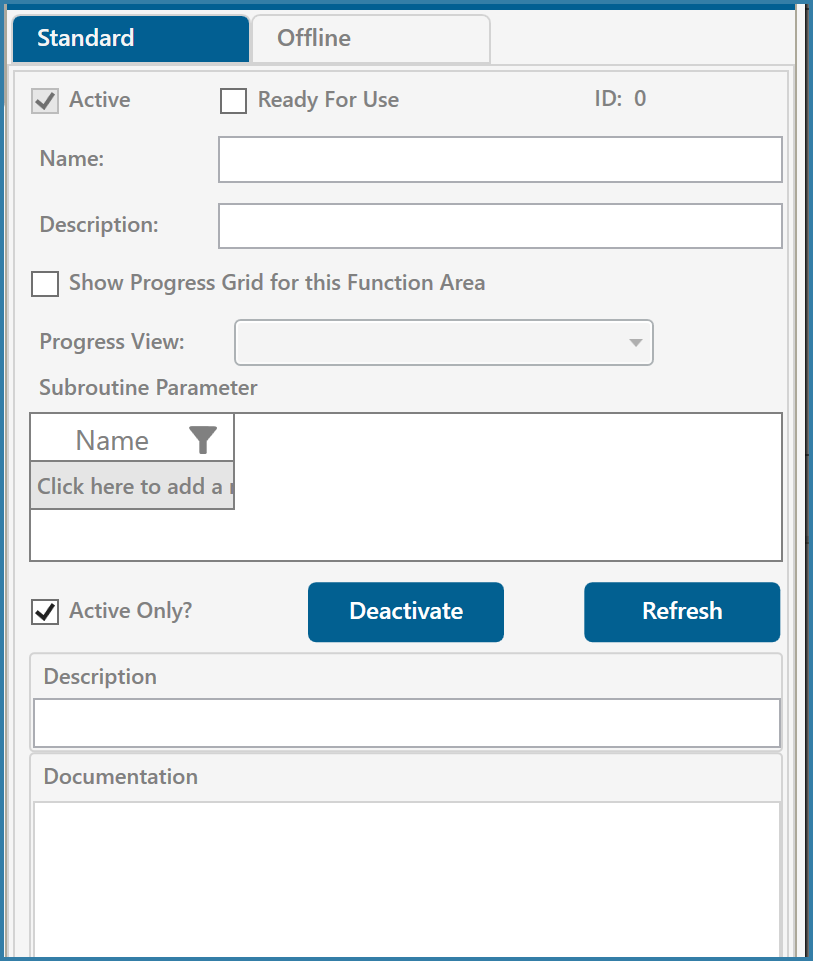
Once the user has selected the + to add a new Subroutine Function Area, they will see the form below
Configuring Subroutine Functions
In addition to giving the subroutine a name and a description, you can also specify parameters. This is a critical part of the subroutine function because the parameters are what is passed from the calling function to the subroutine.
As with function areas, it is possible to change the display colour of a subroutine from Orange to Green by selecting the Ready to Use flag.
In the case of the dealing with a complex barcode structure as described above, the parameter passed would be the barcode that was scanned by the user. Multiple parameters can be passed to a subroutine and generally we would expect at least one parameter to be passed. If there are no parameters passed, the subroutine will not know anything about the calling function.
Once the Subroutine has been defined, the next part of the process is to define the steps in the subroutine. These are added in the same way as standard function area steps but there are a few additional rules to bear in mind. We will cover these below
Adding Steps to a Subroutine
Steps can be added to a subroutine in the same way as they can be added to any other function area with two exceptions:
1 - A subroutine cannot call another subroutine. You can have two subroutines in a single function area if required but you cannot have a subroutine inside another subroutine.
2 - You cannot close a subroutine so there is no close step allowed. If this were allowed, the software would have no way of knowing where to go next. Exiting a subroutine is dealt with on the Next Step and Skip to Step options.
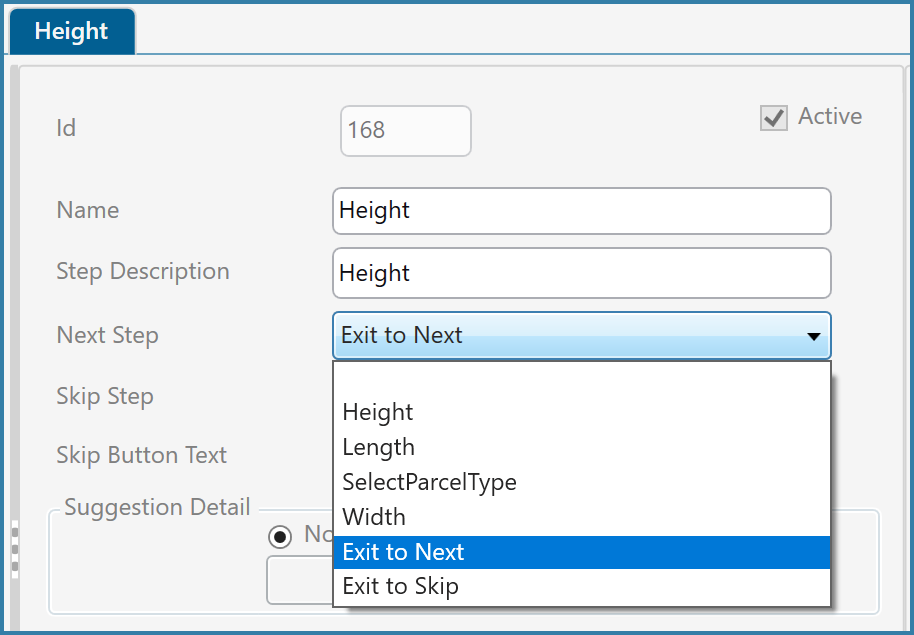
In addition to being able to use Skip and Next to go to any steps in the subroutine, there are two additional options. 'Exit to Next' and 'Skip to Next' as shown above.
Exit to Next If you select this option on the Next Step field then this means that the process will exit the subroutine and go to the next step defined in the Step Sequence of the calling function area. You can Exit to Next either on the OK button or the Skip button on the scanner.
Exit to Skip There is an additional option on the Skip button that allows you to exit the subroutine to the Skip step rather than the next step.
If you are using the subroutine in the barcode example, then the next step may be to Enter the Quantity. However, if you want to end the function area directly after running the subroutine then simply make the next step after the subroutine be a close step and then Exit to Next to close the function.
Other than these four items, build you subroutine up as you normally would.
There are some examples shown on this form - the important part is to use the referencing variable correctly. An example of how to use data in a subroutine is shown below. Again, we are using the barcode manipulation example. The step has manipulation enabled and is required to manipulation the data passed from the calling function:

Example of a subroutine to manipulate a complex barcode

Mapping subroutine steps
It is important to note how the mapping is done. In this case, we want to manipulate the value passed from the calling function which means we need to manipulate the name of the Parameter being passed to the subroutine as shown above.
The next step is to call your subroutine from a standard function area as described here
Or to call your subroutine from a grid as described here