TL Selector
TL Selectors are built on the Grid Function Area maintenace form. The TL Selector Grid is supported on both Android and Windows EazyTouch. This overlay is widely used and allows the user to specify a view that they would like to display and then see the data on the EazyTouch form in a grid format.
It is possible to act on the data displayed in the grid by using subroutines. Up to 5 subroutines can be linked to each TL Selector Overlay. These subroutines are called by using a button per subroutine at the bottom of the form.
To build a TL Selector use the Grid Function Area maintenance form and select the TL Selector option as shown below.
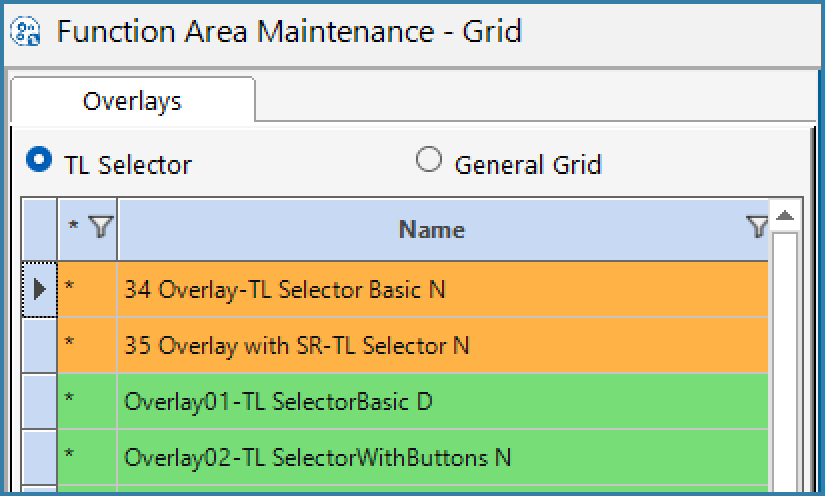
TL Selector Overlay Functions
Clicking on a function (or selecting to add a new function) will show the main configuration form as below.
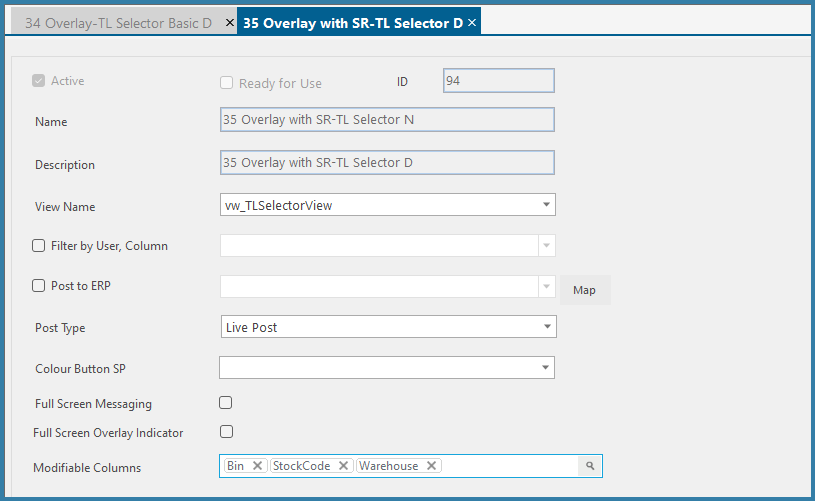
TL Selector Configuration
The function Name and Description are standard.
The View Name is the name of the SQL view that contains the data to be presented on the grid.
- Post to ERP, Post Type - It is possible to post data to Syspro with a core TransLution button. It is more common for TransLution to be implemented to use a Subroutine with a Post Step and this option is no longer commonly used even though it is still supported.
- Filter by User - if you want to see data relating only to a specific user, you can include the user name in the view being used and select Filter by User and also define which column contains the username you wish to filter by. This setting will filter the data before it is displayed on the EazyTouch screen.
- Colour Button SP - This is the name of the Stored Procedure that will change the function area button colour red or green. This applies to EazyTouch for Windows only.
- Full Screen Overlay Indicator - If this option is selected, the Overlay is opened without the numeric keypad panel on the RHS giving more space to the grid.
- Full Screen Messaging - When a subroutine is called, this option will show errors on the SR steps as full screen errors rather than standard errors.
- Modifiable Columns - It is possible to allow users to enter data into only certain columns on the grid. This is where you choose which columns users can modify.
Below this you will see a sample of the grid and options to define the custom buttons as shown here.
Sample Date
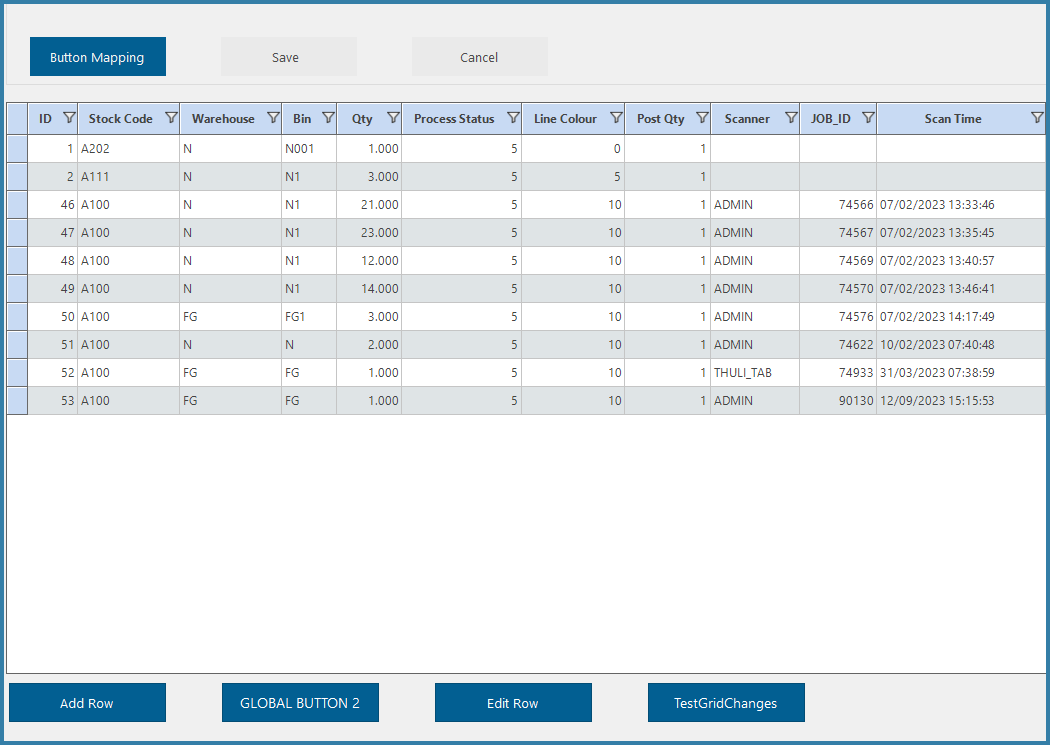
The next step is to define which subroutines you want to call to act on rows on the grid. These subroutines are used to do things like print labels, post data to Syspro or log changes users make to data in the grids.
Clicking on the Button Mapping form allows you to define which Subroutines to call and is covered here
Rules for the TL Selector view.
There are some required columns and without them the grid will not work correctly.
- There must be an ID (int) column.
- If you want rows to be coloured, there should be a row called LineColour. Rows will be coloured as follows be default. Layouts can be used to define any row colours and to may colours dependent on any column value but this is a quick and easy way to define colours.
0 = white
5 = green
10 = red
15 = yellow
20 = orange
25 = pink
- If you want to filter by user (as above) the view must contain a column with the user id (it can be called anything)
- The number of columns allowed in the view is limited to 20.
The Line Colour and ID columns will not be visible on the grid.
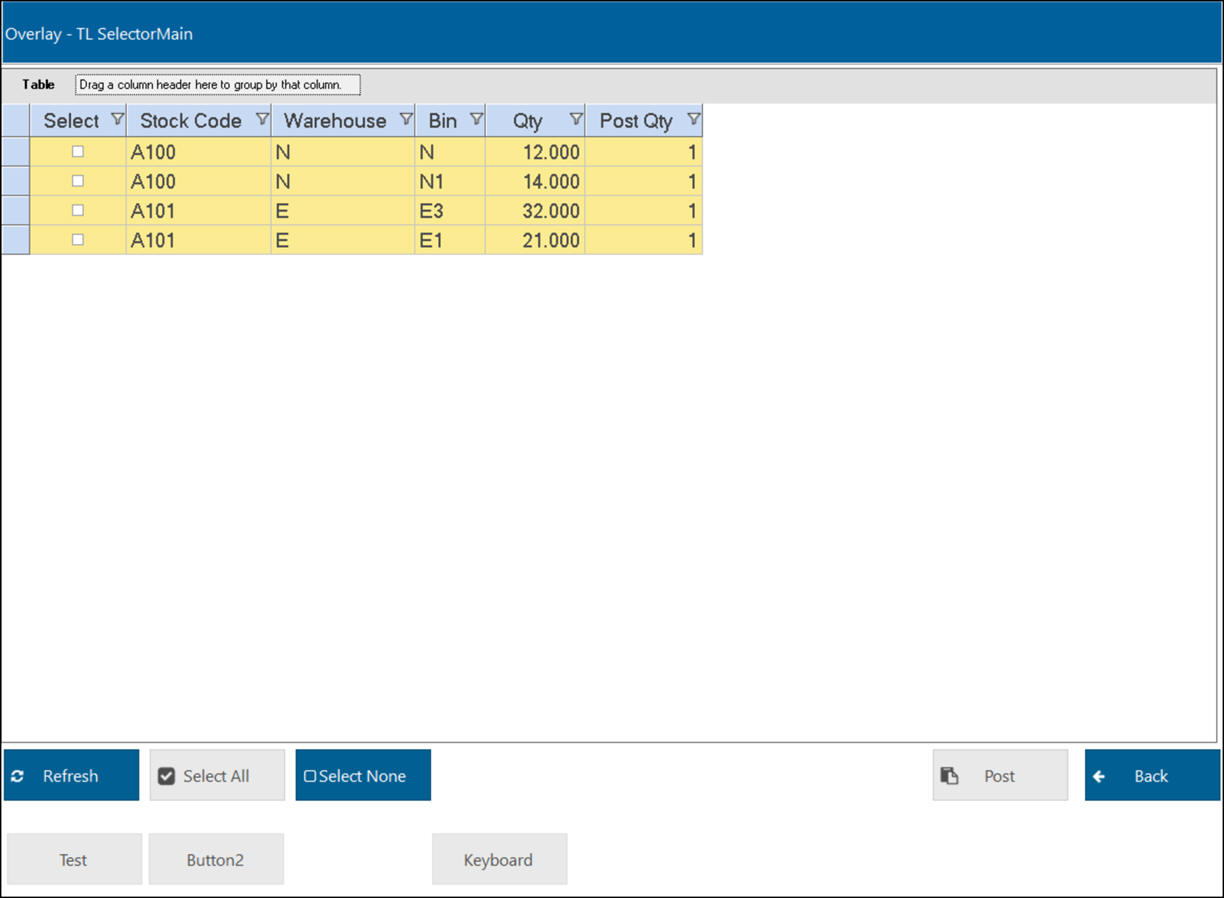
An example of a TL Selector Overlay along with some subroutine buttons that will be passed the selected row IDs is shown below.