Building Function Areas Using Step Maintenance
The first part of the process to build scanner functions for users is to define the function area. The function area description is what the user will see on the EazyScan or EazyTouch screens when deciding what they need to do.
The image below shows the Function Area panel on the Step Maintenance form. We will be covering Standard Functions in this section. Subroutine functions are covered separately. The differences between Standard Mode and Offline Mode are covered here. Charts are covered here.
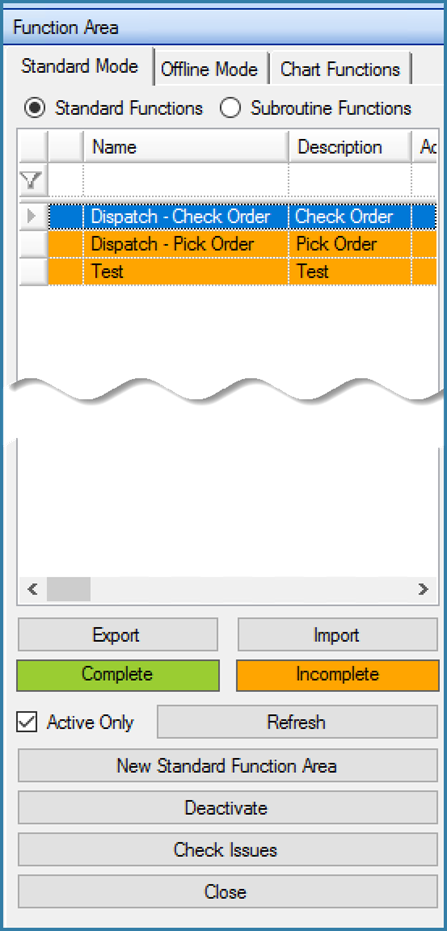
Function Area Panel on Function Step Maintenance Form
This panel shows a list of active function areas. Before adding a new function there are a few items to look at:
Check Issues - This option will run through all the function areas and highlight any possible issues. This would include but not be limited to things like validations that are not fully mapped, Log steps without a logdata table selected, Post steps without a business object selected. The aim is to highlight anything that could be a problem with any function area. The process can take a while if there are a lot of functions each with many steps. An alternative could be to right click on any function. This will open the form below.
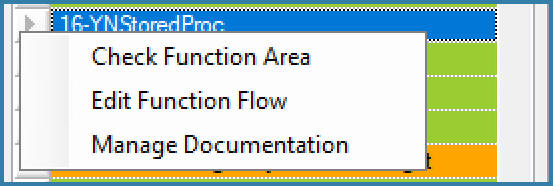
Check Function Area - This does the same as Check Issues but only for the selected function.
Edit Function Flow - Opens the Function Area Maintenance form as shown below
Manage Documentation - Allows you to document the function details which is useful for reporting purposes as below.
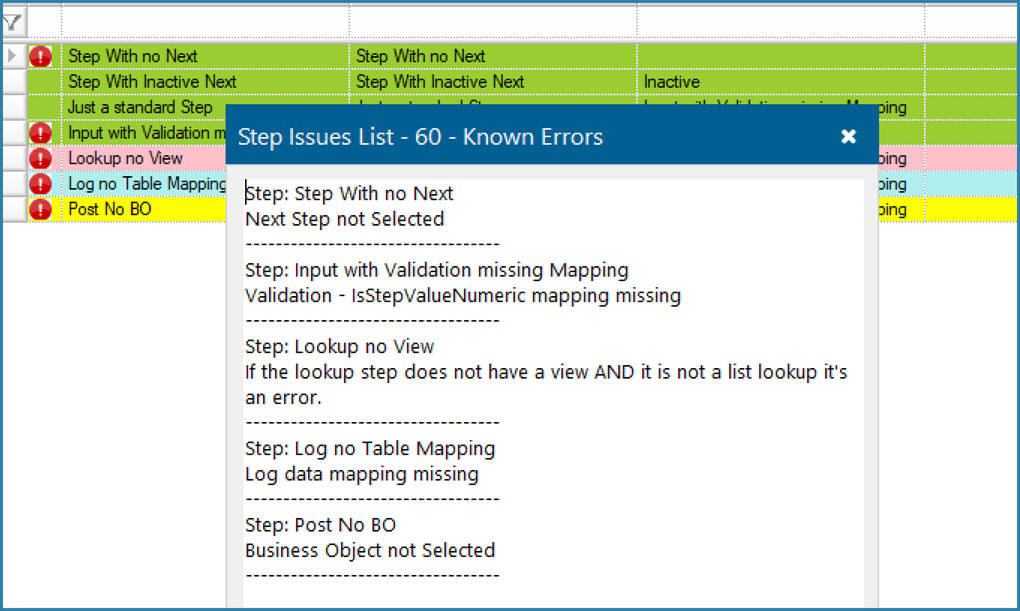
A function area with problems will look like this. Problem steps will show with a red exclamation and also, the user will see a detailed description of the issues that were found:
In order to add a new function area, the user clicks on the New button and sees the form below:
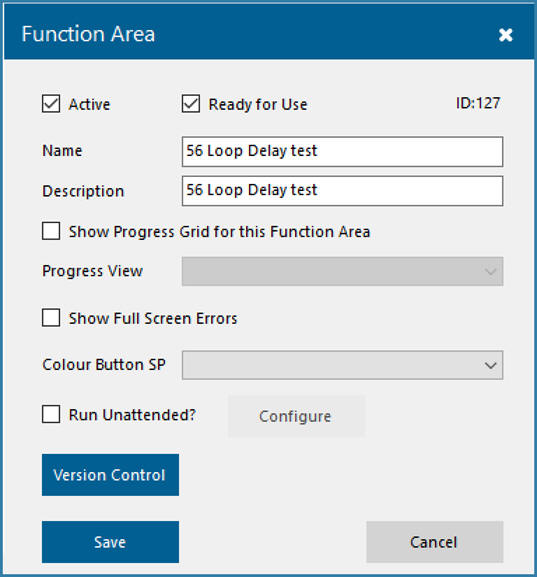
Function Area Definition
All that is required is for the user to enter a name and a description. The description is what the user will see on the Windows EazyScan, Android or EazyTouch forms. When the user clicks on Save, the function area will appear on the grid above.
There are various options here, none of which are required as part of the function definition. These are all covered below.
Active: Active function areas are shown on the list on this form for maintenance and also shown on scanners if the user is given permission to see the function. If a function is marked as inactive it will never be seen even if the user has permission to the function. Clicking on the Active checkbox will change the active status. To view inactive functions, click on the Active Only checkbox to deselect the default option of viewing active functions only.
Ready for Use: When a function is newly created, it will appear in orange on the list of functions. Once you have tested the function and are happy that it is ready for use then check this box and it will be shown in green. This checkbox is purely a display option on this form to help implementers to distinguish between functions that they are still working on and those they have completed.
If the user wants to see a progress grid as they scan they can enable that option here. The details of setting up a progress grid are defined Progress Grid setup
Full Screen errors are, as the name indicates a way to show error messages as a full screen error rather than a message box. The option is only supported on Windows EazyTouch
Colour Buttons give you the option to make your function area buttons green or red rather than grey as they are by default this function is also only supported on Windows EaxyTouch.
Run Unattended is the option to run the function area without user intervention or user input. Functions that run unattended are never available for user selection.
Version control is dealt with here
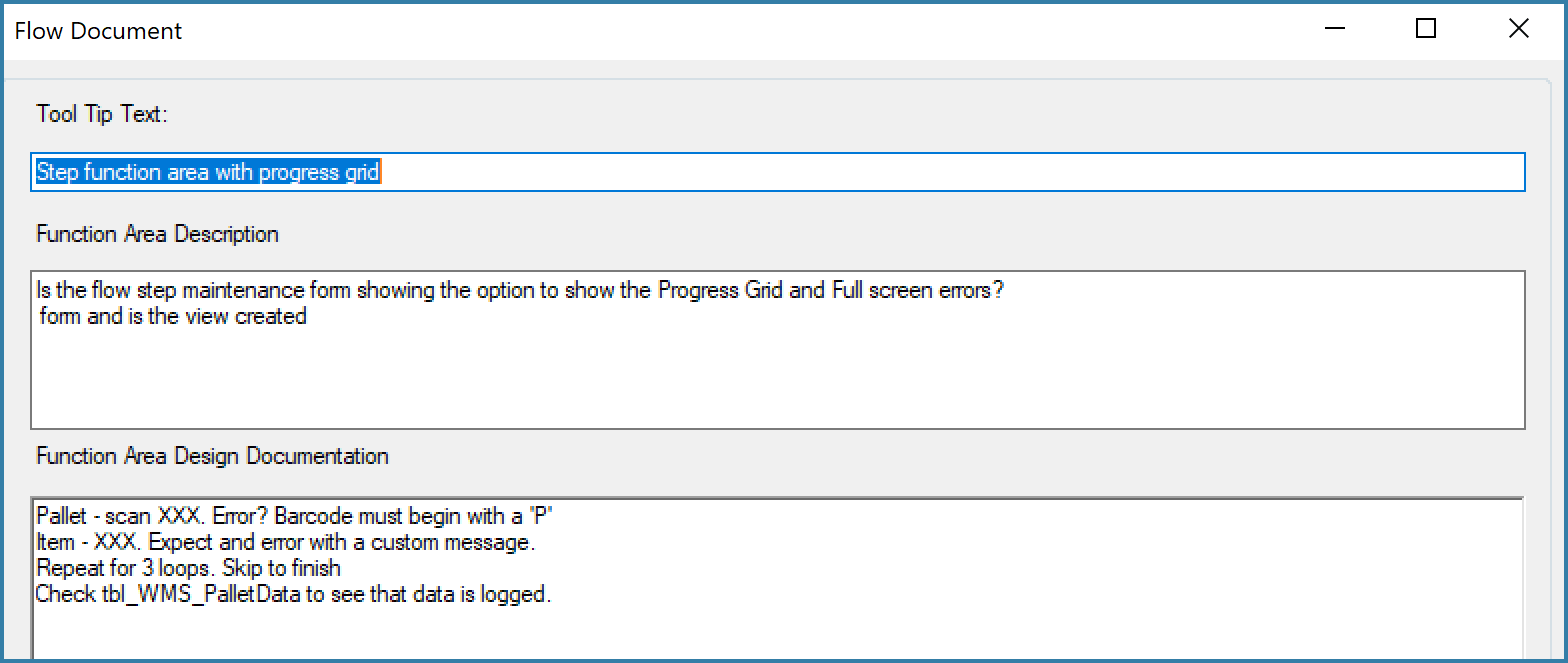
Function area Documentation opens the form below allowing you to document the function. Tool Tip text is a placeholder for future and is not used on the clients.
